
≈ 3 min read
Connect Claritalk to Microsoft Copilot
Via the Model Context Protocol (MCP), an agent in Microsoft Copilot Studio can access meetings, summaries, transcripts, files and tasks from Claritalk. This guide describes how to add the Claritalk MCP server as a tool to an agent.
The connection uses OAuth 2.0 with Dynamic Client Registration: Copilot registers itself as a client with Claritalk, so you don't need to create a Client ID or Client Secret in advance.
-
Create an agent or open an existing one
Go to copilotstudio.microsoft.com, select Agents in the left sidebar and click New agent in the top right. You can also open an existing agent.
This guide shows the new Copilot Studio experience ("New experience" toggle in the top right).

Agents overview with the New agent button -
Open Tools
Give the agent a name. In the right panel next to Tools, click the plus sign.
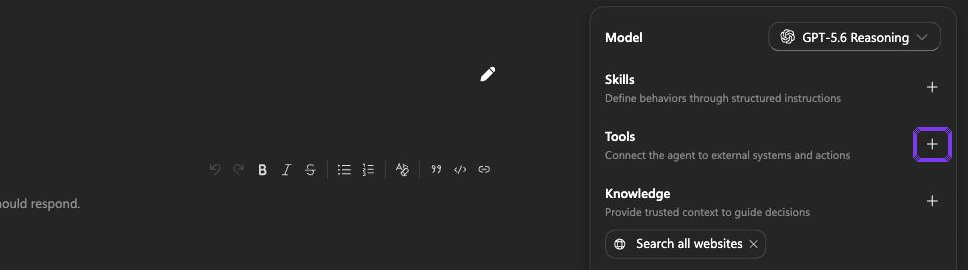
Agent right panel: Tools -
Choose "Model Context Protocol (MCP)"
In the Add a tool window, select the Model Context Protocol (MCP) tab. The list shows only Microsoft's MCP servers; Claritalk is not among them. Therefore, click + Add in the top right.
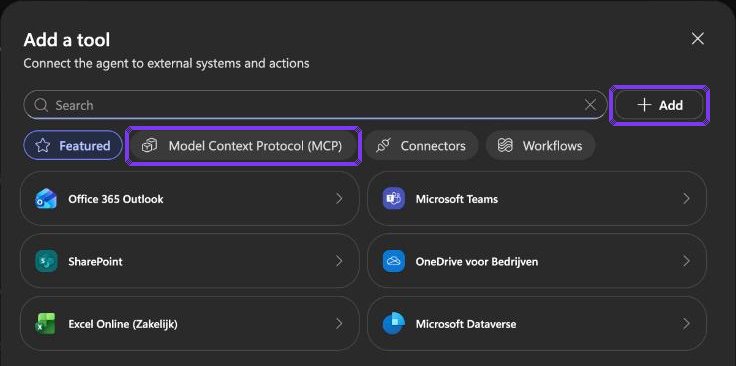
Add a tool with the Model Context Protocol (MCP) tab -
Add a custom MCP server
From the menu under + Add, choose Model Context Protocol (MCP).
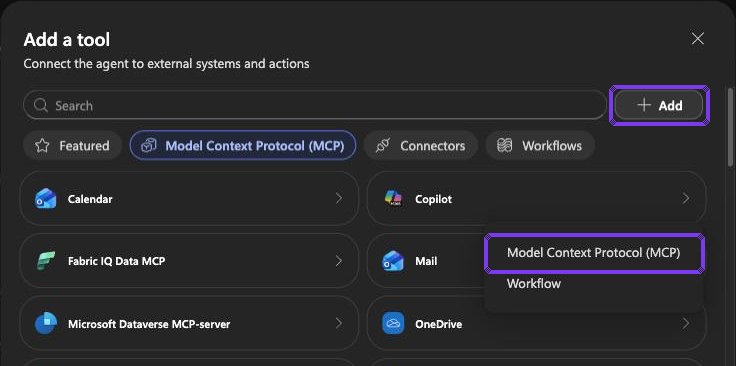
Menu under + Add -
Enter the server details
Enter: Server name "Claritalk", a brief Server description, and as Server URL
https://app.claritalk.com/mcp/claritalk. Under Authentication, select OAuth 2.0 and under Configuration type, select Dynamic (with discovery). Click Add.Dynamic (with discovery) allows Copilot to retrieve Claritalk's OAuth endpoints itself and register via Dynamic Client Registration (DCR). You don't need to enter a Client ID or Client Secret.
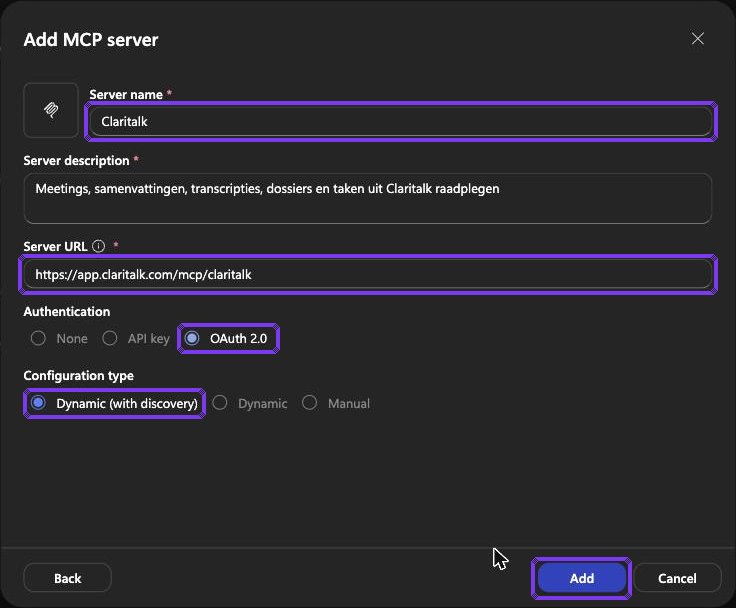
Add MCP server: OAuth 2.0 with Dynamic (with discovery) -
Create a connection
Copilot displays the Select a connection window. Open the menu next to Not connected and choose Create new connection.
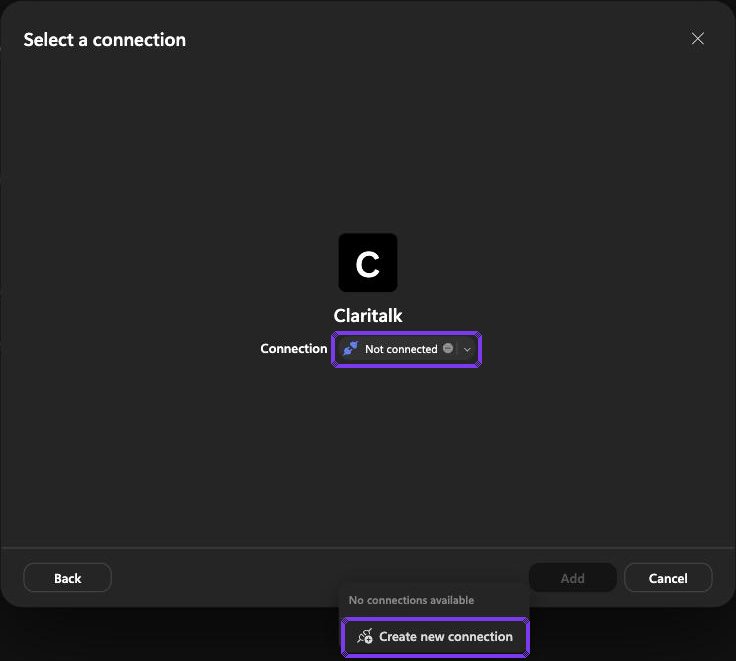
Select a connection: Create new connection -
Sign in to Claritalk
Click Create. Your browser opens Claritalk's authorization page; verify the account and click Allow access. Back in Copilot Studio, the connection shows as connected; click Add to add the tool to the agent.
Through this connection, Claude receives read-only access to conversations, summaries and transcripts that you have access to.
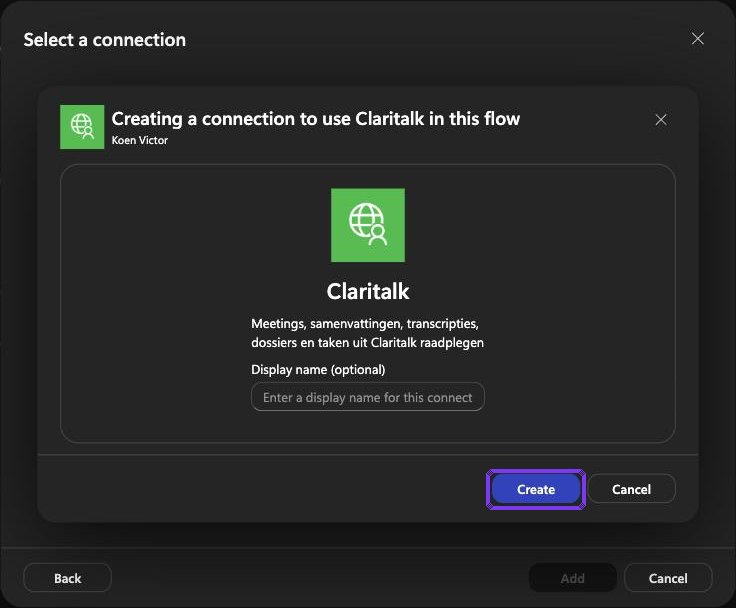
Create connection with the Create button -
Test and publish
Save the agent, test in Preview with a question like "What meetings did I have this week?" and then click Publish in the top right to make the agent available in Microsoft 365 Copilot.
What the agent can do next
- Retrieve meeting information and meeting reports.
- Search for files and tasks.
- Search transcripts for appointments or topics.
- Create reports based on a period or team.
Troubleshooting
- No sign-in screen: verify that the server is reachable and the user has access to Claritalk.
- Registration error (BadRequest): the Claritalk server does not accept the DCR request from Copilot; contact Claritalk.
- Tools not loading: check the server URL and whether the user is successfully signed in; disconnect and reconnect.