
≈ 5 min read
Connect Claritalk to Claude
With the Claritalk connector, Claude can access your meetings, summaries, transcripts, files and tasks. The connection runs via a remote MCP server and takes a few minutes.
Choose below how you use Claude. Both procedures use the same server and the same authorization in Claritalk.
Claude chat (claude.ai)
First add and authorize the connector once (steps 1 to 6), then enable it per conversation (steps 7 and 8).
-
Open Connectors under Customize
Click Customize in the left sidebar of claude.ai and select the Connectors tab at the top. Click the Add button on the right.
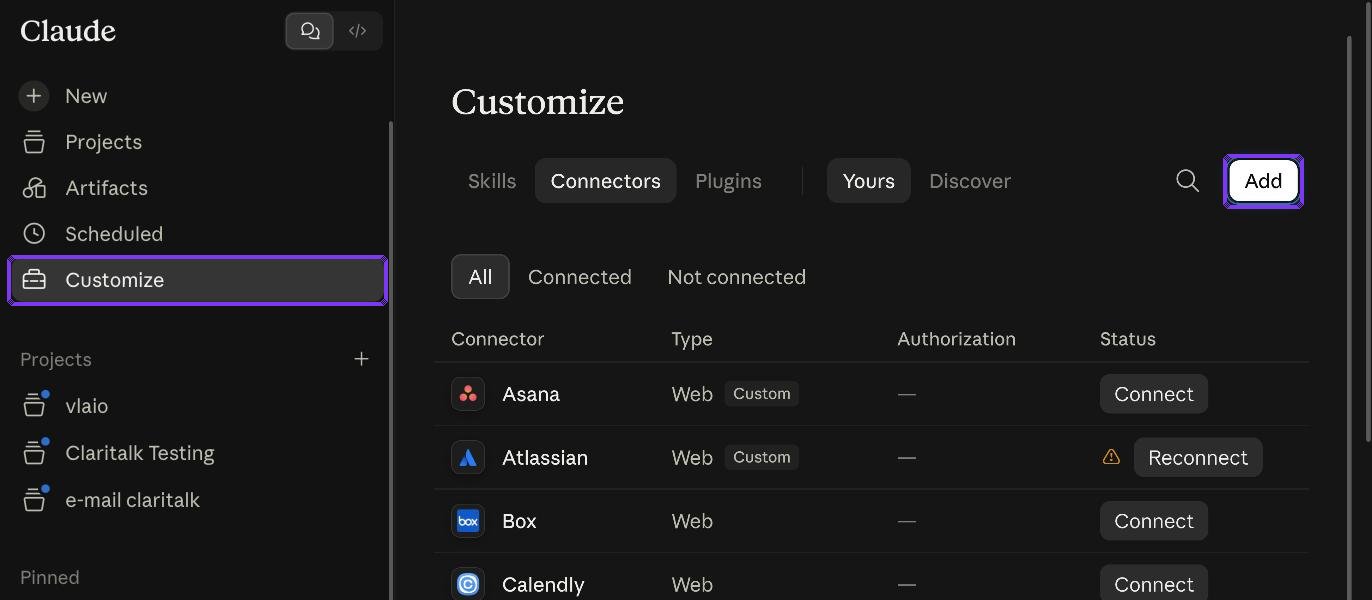
Customize → Connectors, with the Add button in the top right -
Choose "Add custom connector"
A dialog box opens with two fields: a name and the URL of the MCP server.
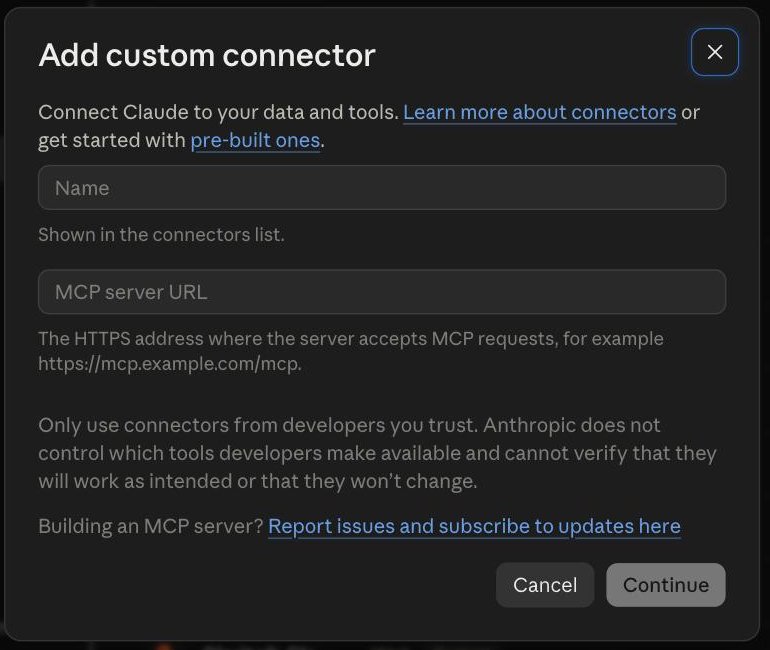
The empty Add custom connector dialog -
Fill in name and URL
Enter Claritalk as the name and
https://app.claritalk.com/mcp/claritalkas the MCP server URL. Click Continue.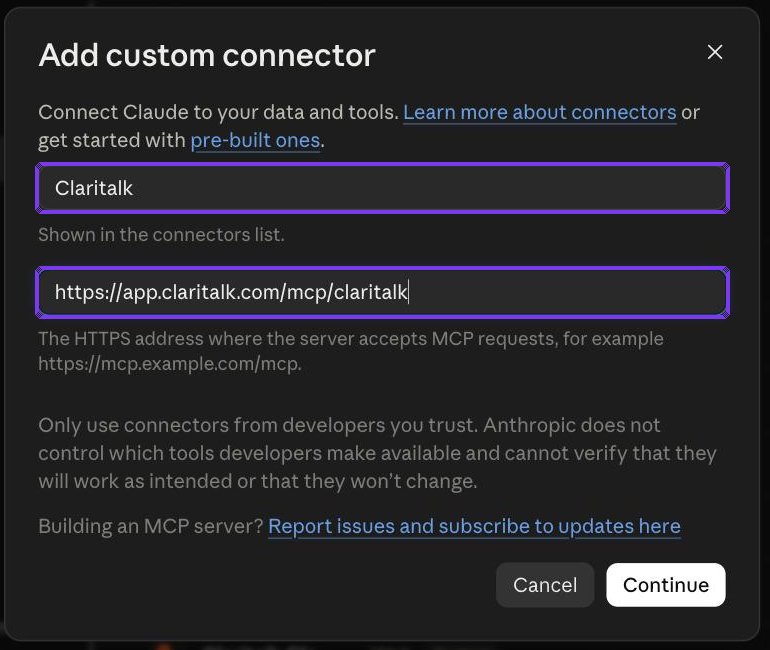
Name and URL filled in -
Leave the authentication settings as they are
Claude reads the server and automatically detects Sign in now (sign in via OAuth) and Register automatically (Dynamic Client Registration). You do not need to enter a Client ID or Secret. Click Add at the bottom.
Only enter something under "Use your own OAuth client" if your IT department explicitly asks you to.
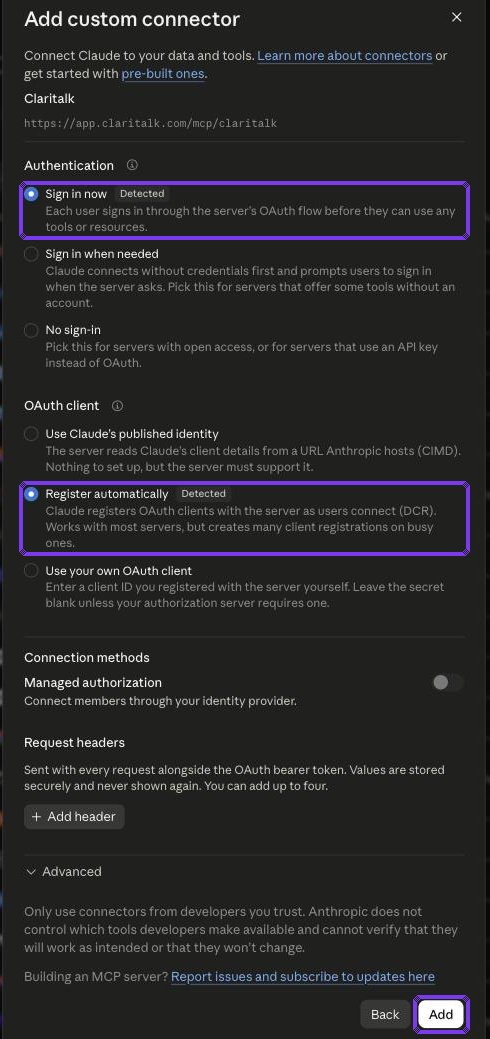
Both options are marked as Detected -
Click on Connect
The connector has been created but is not yet connected to your Claritalk account. Click Connect.
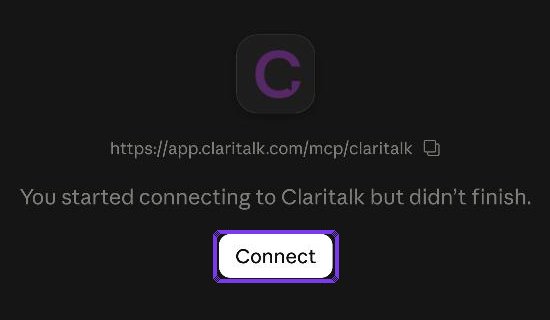
Connector page with the Connect button -
Grant Claude access in Claritalk
Your browser opens the Claritalk authorization page. Verify that you are logged in with the correct account and click Allow access. You will return automatically to claude.ai; the connector is now connected.
Claude receives read-only permissions: it can access conversations, summaries and transcripts that you have access to, and cannot create, modify or delete anything in Claritalk.
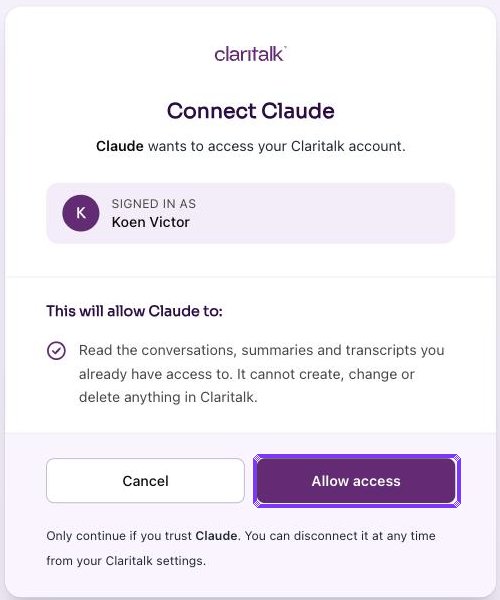
Claritalk authorization page -
Open Connectors in a conversation
In a new or existing conversation, click the + button below the input field and go to Connectors.
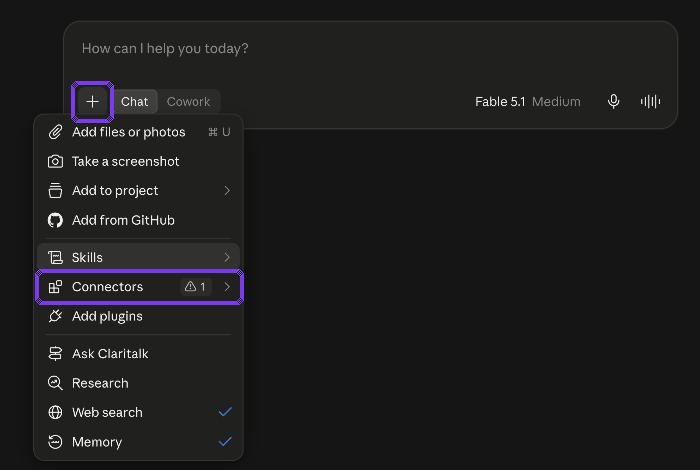
The + menu below the input field -
Turn on Claritalk
Turn on the toggle next to Claritalk. The Claritalk tools are now available in this conversation; for example, you can ask about your recent meetings or a summary of a file.
The toggles apply per conversation. Via Manage connectors you can return to the overview page.
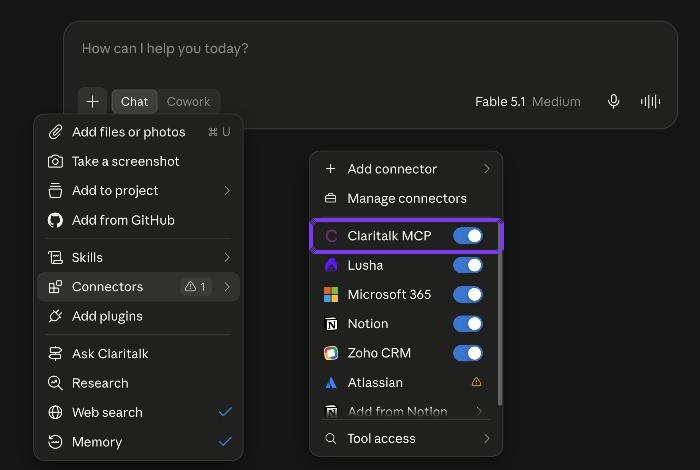
Enable or disable connectors per conversation (shown here as "Claritalk MCP")
Claude Code (terminal)
Four steps: add server, start Claude Code, authenticate via /mcp and approve in the browser.
-
Add the MCP server
In the terminal, outside a Claude session, run this command:
Add
-s userif the server should be available in all your projects instead of just the current directory.# only in the current directory $ claude mcp add --transport http claritalk https://app.claritalk.com/mcp/claritalk # in all projects $ claude mcp add -s user --transport http claritalk https://app.claritalk.com/mcp/claritalkWithout -s user the server applies only to the current directory; with -s user to all projects -
Start Claude Code
Start a new session with
claude.$ claudeA new Claude Code session in the project directory -
Authenticate via /mcp
Type
/mcp, scroll to claritalk (located at the bottom, after the claude.ai connectors), press Enter and choose Authenticate.> /mcp ...claude.ai connectors... > claritalk needs authentication claritalk > AuthenticateSchematic representation of the /mcp menu: claritalk at the bottom, then Authenticate -
Grant access in the browser
Your browser automatically opens the Claritalk authorization page. Click Allow access. The browser returns to a localhost page and Claude Code loads the Claritalk tools immediately; you can continue using the session normally.
This is the same authorization page as in step 6 of the claude.ai procedure. Here too, Claude receives read-only permissions.
browser: app.claritalk.com/oauth/authorize -> Allow access -> localhostThe flow of authorization; after that the tools are available in the session
What you can now ask
- "Give me a briefing of my meetings this week."
- "Summarize the latest conversation with customer X."
- "What open tasks are on my name?"
- "Search the transcripts for agreements about the price increase."
Manage connection
- Disconnect or reconnect: Customize → Connectors, click on the Claritalk connector.
- Revoke access from Claritalk: via your settings in Claritalk, under linked applications.
- If authorization expires, Claude shows a warning icon next to the connector; click Reconnect.
- In Claude Code:
/mcpfor status and re-authenticate,claude mcp remove claritalkto remove the server.