≈ 3 min read
Add Claritalk
to ChatGPT
Connect Claritalk via MCP and ask ChatGPT questions about your conversations and files. Sign in with your Claritalk account via OAuth.
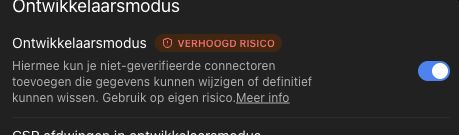
1. Enable Developer Mode
Open your profile menu → Settings → Security and login. Turn on Developer Mode.
Availability depends on your account and your organization's settings. OpenAI documentation
2. Add a new plugin
Close the settings and open Plugins in the sidebar, or go to ChatGPT Plugins. Click the + button in the top right (Create app).

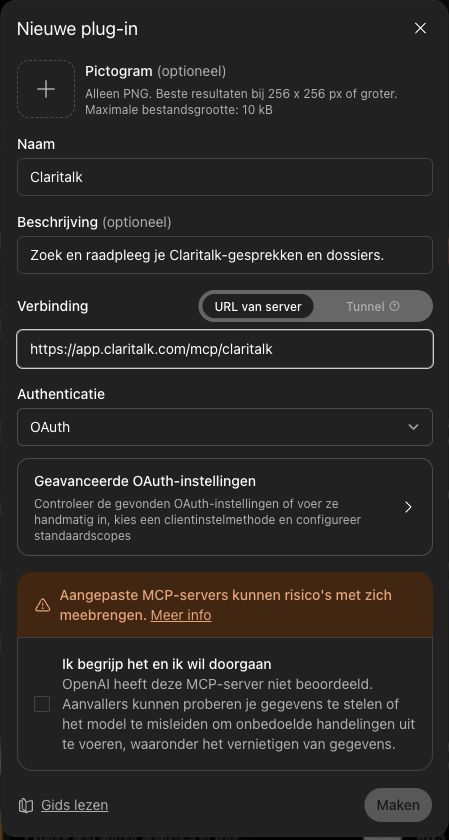
3. Enter the Claritalk details
Use the following settings. Adding an icon is optional.
| Field | Value |
|---|---|
| Name | Claritalk |
| Description (optional) | Search and access your Claritalk conversations and files. |
| Connection | Server URL |
| MCP Server URL | https://app.claritalk.com/mcp/claritalk |
| Authentication | OAuth |
4. Check the OAuth settings
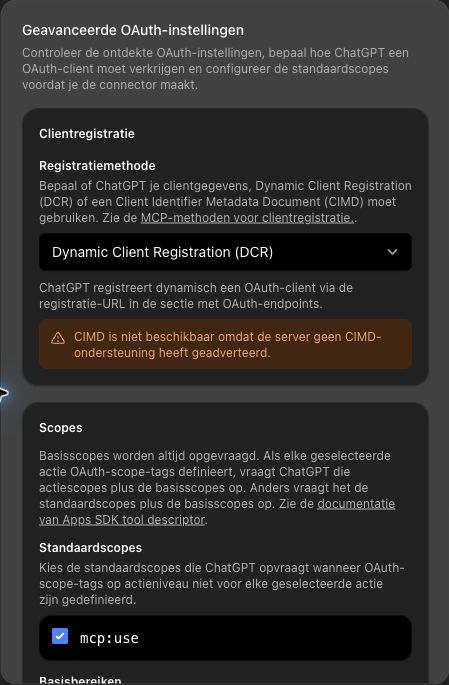
ChatGPT automatically recognizes Claritalk's OAuth configuration. Under Advanced OAuth settings you will see:
- Registration method: Dynamic Client Registration (DCR).
- Default scope:
mcp:use.
Leave these settings as they are. With DCR you do not need to manually enter a Client ID or Client Secret. The message that CIMD is not available does not prevent the use of DCR.
5. Create the connection and sign in
- Read the message about custom MCP servers.
- Check I understand and want to proceed if you agree and click Create.
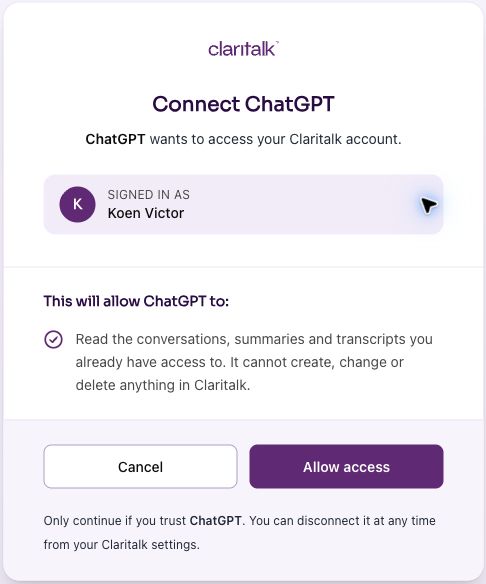
- Follow the OAuth sign-in steps and sign in to Claritalk. If you are already signed in, the Connect ChatGPT screen will appear immediately.
- Check the account at Signed in as. ChatGPT only requests read access to conversations, summaries, and transcripts that you have access to. According to this screen, the connection cannot create, modify, or delete anything.
- Click Allow access to grant permission, or Cancel to cancel.
- Return to ChatGPT.
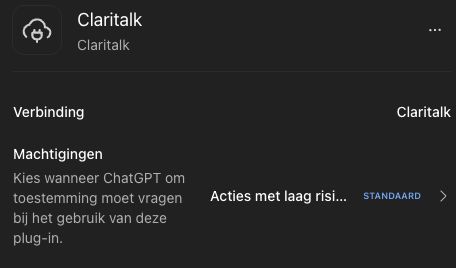
After granting permission, you will return to ChatGPT. In the Claritalk settings you will see the connection and the available actions. In this check, ChatGPT listed OAuth as the authorization used.
6. Use Claritalk in a conversation
Start a new chat and select Claritalk from the tools or plugins menu. For a developer connection, this may be under + → Developer Mode. OpenAI documentation
Try for example:
Use Claritalk to show my five most recent conversations.
Search Claritalk for conversations about customer follow-up and summarize the key agreements.
Not working?
- No add button: check developer mode or ask your workspace administrator if custom MCP connections are allowed.
- Connection failed: check the full server URL and select OAuth.
- Claritalk is not being used: select the connection in a new chat and explicitly mention Claritalk in your question.