
≈ 3 min read
Guide
Approve permissions in Microsoft Entra
Claritalk uses Microsoft Graph API permissions to function fully within your organization. An administrator approves these permissions via Microsoft Entra (formerly Azure AD). This guide describes step by step how.
Why are these permissions needed?
The Claritalk app needs access to specific parts of Microsoft 365 — such as calendars and user data — to fully utilize its functionalities. Without the right permissions, certain features don't work, such as retrieving calendar appointments. By approving the permissions below, you ensure a seamless experience for users.
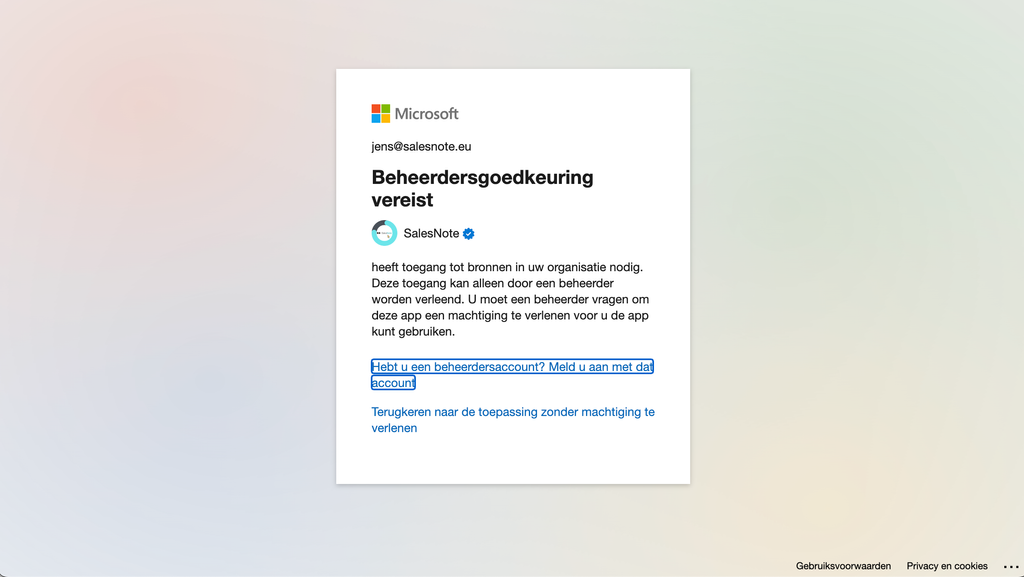
Overview of required permissions
| Permission | Description | Why needed? |
|---|---|---|
| Calendars.ReadWrite | Full read and write access to the user's calendar. | For creating, editing and managing calendar appointments in the app. |
| Access to the user's primary email address. | Required for identifying users. | |
| offline_access | Retrieve data when the user is offline. | So the app retains access without the user having to log in again. |
| OnlineMeetings.Read | Read the user's online meetings. | For displaying and synchronizing online meetings. |
| openid | Confirms identity via OpenID Connect. | Required for authentication and to log into the app. |
| Presence.Read | Read availability status in Microsoft Teams. | For displaying availability status in the app. |
| profile | Basic profile information (name, photo). | For personalizing the user experience. |
| User.Read | Read basic user information (name, email address). | To verify and display the identity of the logged-in user. |
Step-by-step guide for approval
Log in to Microsoft Entra
Go to the Microsoft Entra Admin Center and log in with a Microsoft 365 administrator account that has permission to approve permissions.
Open Enterprise applications
Click on Enterprise applications in the left menu and search for Claritalk App via the search bar. Click on the app once it appears.
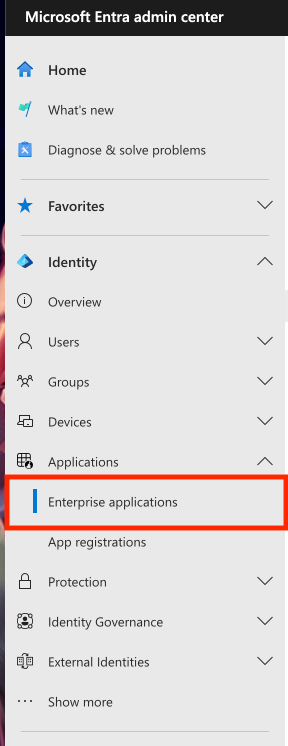
Enterprise applications in the Entra menu 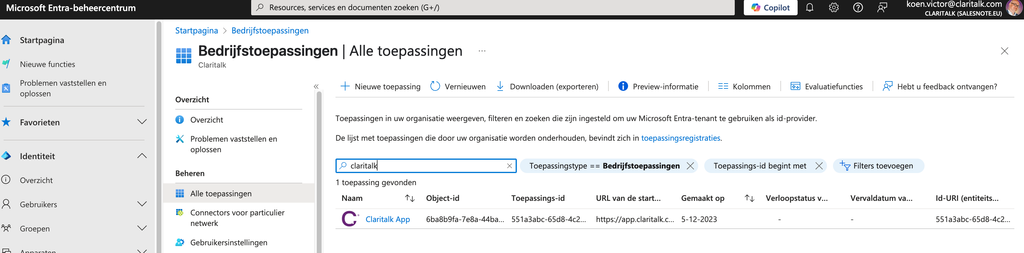
Search for and open the Claritalk App View the permissions overview
Navigate to Permissions in the app settings and verify that the permissions mentioned above are listed.
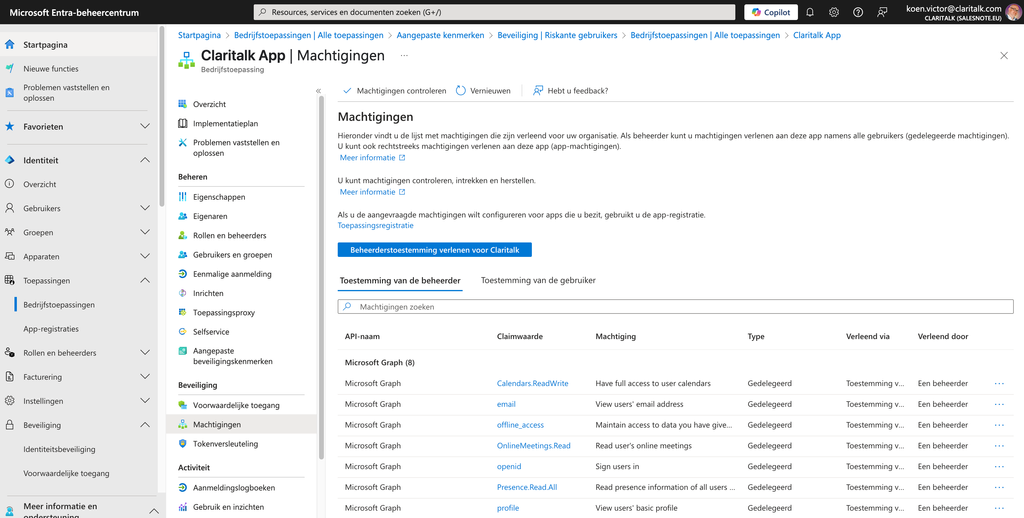
The permissions overview of the Claritalk App Grant admin consent
Click on Grant admin consent for [Tenant Name] at the top and confirm in the pop-up with Accept. The permissions status will be updated to Admin consented.
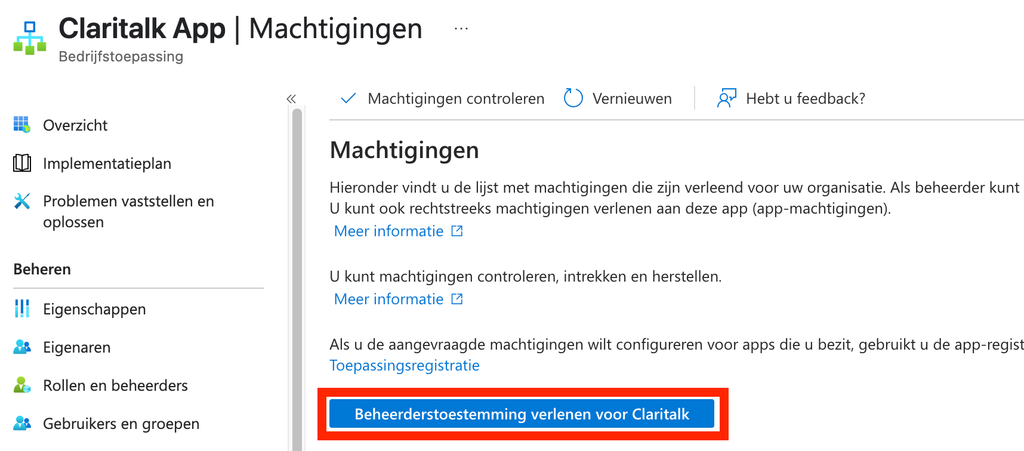
The Grant admin consent button 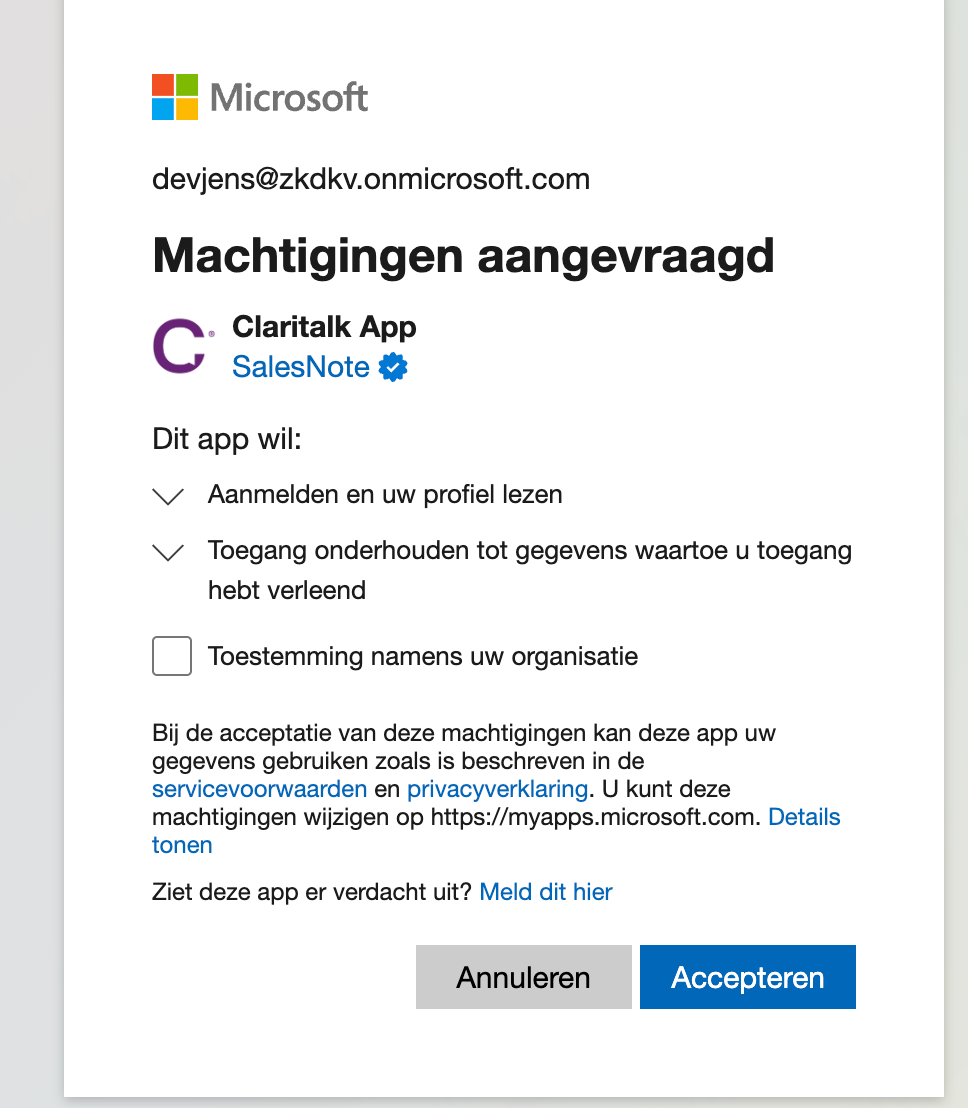
Confirm the requested permissions by clicking Accept Verify the permissions
Go back to Permissions and verify that all permissions have the status Admin consented. Optionally test briefly by logging in as a regular user and checking that everything works, such as retrieving calendar appointments.
Common problems and solutions
| Problem | Solution |
|---|---|
| No access to the Entra Admin Center | Use a Microsoft 365 administrator account that is allowed to manage applications and approve permissions. |
| The "Grant admin consent" button is not available | Check that you are logged in with an account that has Global Administrator or Privileged Role Administrator rights. |
| Certain permissions are not listed | The app may not have been installed or registered correctly in your tenant. Check that the correct version has been added, or contact Claritalk. |
| "Admin consent required" | The Microsoft 365 account being used is not allowed to approve permissions. Please contact your network partner so they can set this up. |
Guide as PDF
Prefer to send the guide as a document to your IT partner? Download the PDF version of this guide.